
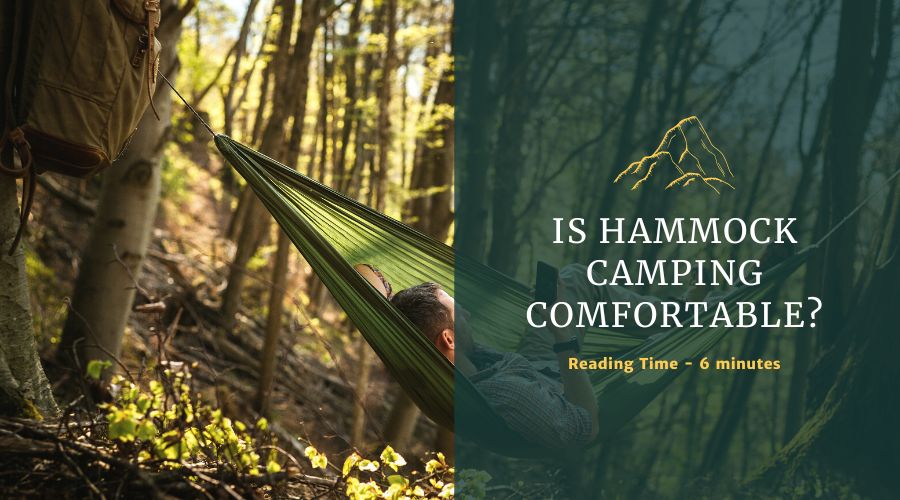
Who is this hammock camping guide for? This is the most comprehensive hammock camping guide for beginners as well as experienced campers. It covers the most basics of hammock camping and as well as teaches you best practices for safe hummocking. I also have a detailed resource section at the end with commonly faced issues and their solutions.
Columbus is famous for the discovery of the Americas but very few people know that he also introduced Europe to a kind of bed that is hanged between two trees i-e the Hammock.
The hammock was an integral part of central and southern America long before Columbus set foot on the continent. In 1492, he wrote that he saw “people sleeping inside nets hanged between the trees”.
On his way back to Europe, Columbus brought the hammock back to Europe where it became an instant hit with the sailors.
In this hammock camping guide, I am going to explain everything you need to know about hammock camping so that you can camp like a PRO. Most of these are based on my own personal experiences in the wilderness as well as things I picked up from fellow hammock campers.
Let’s get started.
What is hammock camping?
Hammock camping is a kind of camping where you use a hammock as your primary sleeping option instead of the traditional ground tent. Hammock camping not only requires a hammock to sleep in but all the additional necessities to make your night comfortable like top quilt, under quilt, bug net, tarp & rainfly.
Hammocks were used for relaxing along the sunny beaches of central and latin America as back as 15th century but they have recently gained fame with the campers as a potential candidate for wilderness bedding option.
If you are new to camping or have never used or seen a hammock before, let’s take a closer look at a hammock, see what it actually is, how it works, what are major parts of a hammock, what are different types and how can we chose the best one for our next trip.
H for Hammock
Hammock in its simplicity is a 6 – 8 ft long piece of fabric or net tied to a tree that provides an ample space for sleeping in the middle.
That’s the simple definition of a hammock but in practice, hammocks comes in all shapes, sizes and types.
Some are made for your backyard to enjoy lazy Sunday afternoons during the winter. Others are designed to provide a comfy place to sleep in the wild during extreme weathers.
All in all, hammocks are an amazing replacement for a traditional tent (more on this below), and if you haven’t tried it yet, this is your chance to learn everything about it and make your next trip a hammock camping.
Parts of hammock
Lets take a closer look at a hammock system and see what major components it is made from.
Do note that when we say ‘hammock’, we not only mean the fabric in the middle but it also covers all the accessories – both necessary and optional – used to hang and use a hammock during camping.
#1 Fabric
The main part of any hammock is of course the center fabric that makes room for you to cozy in and sleep/relax.
Depending on what kind of hammock you buy, the fabric can either be a net type of a closely netted nylon type.
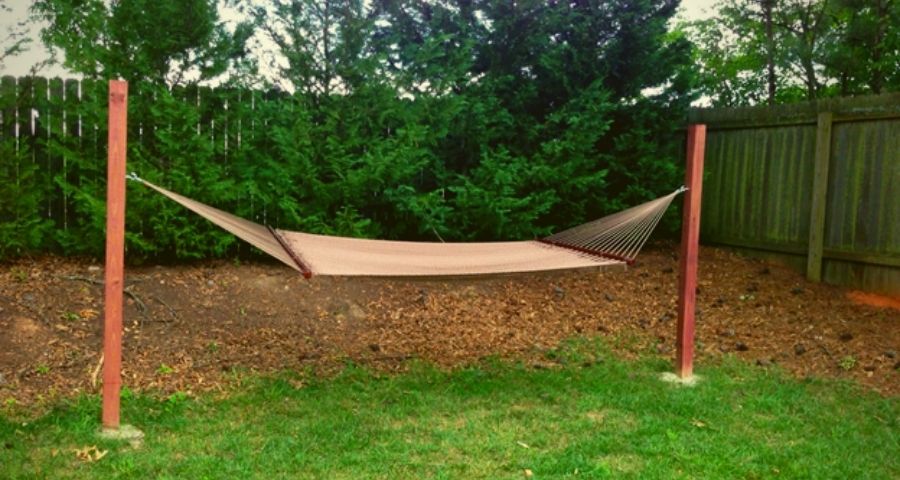
Hammocks used for backyard relaxing or enjoying the sun at beaches are mostly made of loosely netted ropes to make a net structure. They are highly breathable but not suitable for camping.
For camping, nylon fabrics are considered the best. They are strong, don’t sag when you lay in them, and are quite breathable as well to make a comfortable bed in the wild.
The two ends of the fabric are either attached to a spreader bar (more on the different types of hammocks below) or joined to a rope for hanging to the suspension system
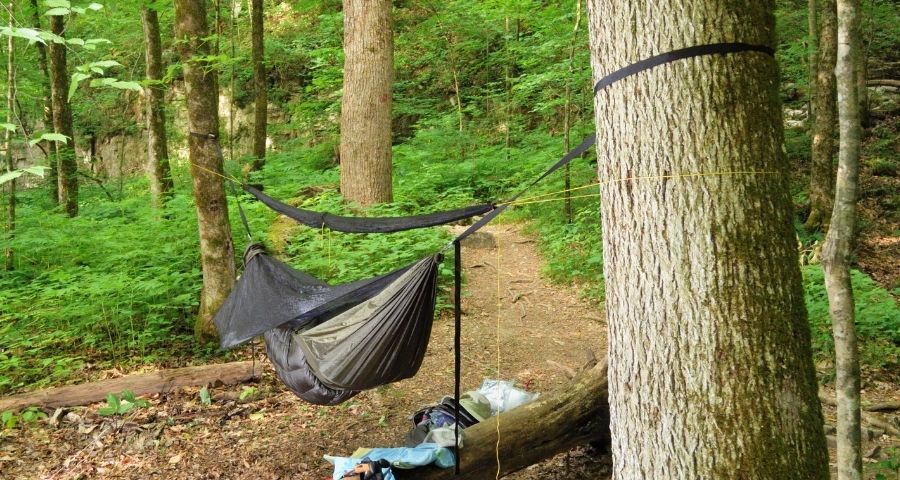
#2 Tree Suspension
The main fabric of the hammock is attached to the trees via suspension ropes/webbings at either end. A good suspension system is strong enough to hold your weight safely, easily adjustable, and safe for the tree trunks.
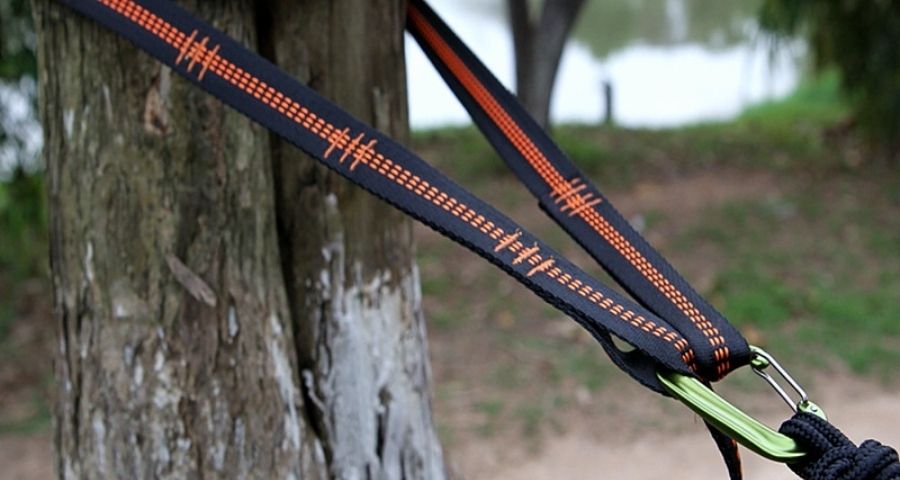
You can attach your hammock to the tree trunk using a number of attachments/techniques. The most common of them are simple rope, webbings, daisy chain straps, or whoopie slings.
If you don’t have any fancy customized attachment type like a daisy chain strap, you can simply loop a piece of rope around a tree, tie a knot, and hang your hammock.
A safer method of hanging your hammock to a tree is by using a Webbing strap. Webbing is a wide and flat piece of non-stretch nylon that hugs the tree trunk securely. Compared to a rope, it has a wider area to distribute the pressure and hence causes less or no damage to the tree.
A more sophisticated version of Webbing is a Daisy Chain strap with adjustable hooks at intervals so that you can adjust your hammock sag easily.
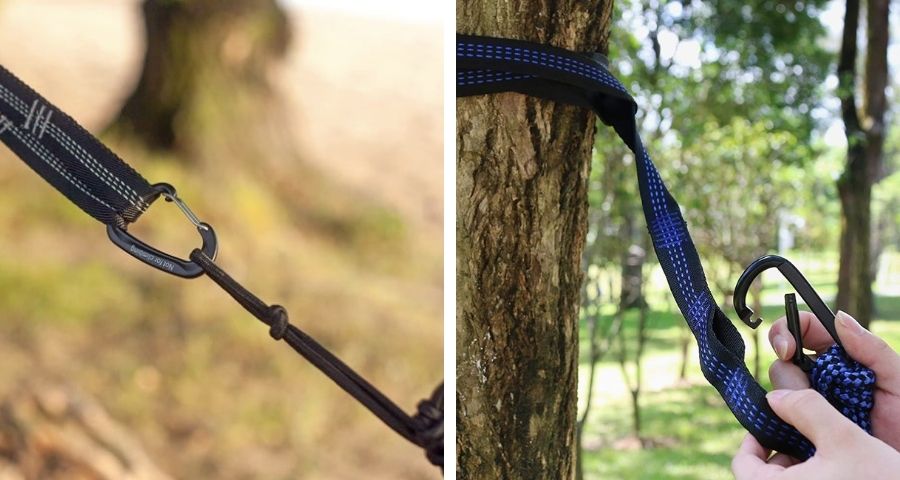
To connect your hammock end to the suspension system, you will need a fixed D-ring or a Carabiner at the end of your hammock.
#3 Ridgeline
Ridgeline is a piece of rope that runs atop your hammock connecting the top ends points where your hammock is attached to the suspension system with D-ring or carabiners.
The basic function of a Ridgeline is to hold the bug/mosquito net and, in some cases, a rain fly. It helps provide a breathing space above your head by holding up whatever accessories you put above your hammock.
Hammocks come with an integrated ridgeline but if your hammock doesn’t have one, you can make one with a simple piece of rope.
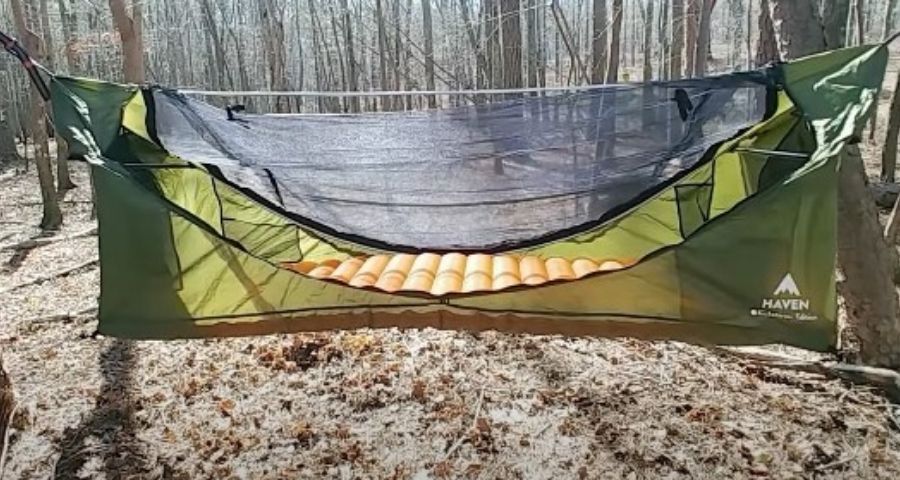
#4 Bug Net
As obvious from the name, a bug net is used to keep the bugs out during spring and summer camping seasons. Some hammocks come with an integrated bug net, but you can also buy a cheap one and pitch it over your ridgeline and tie in the ends to have a bug-free night of sleep.
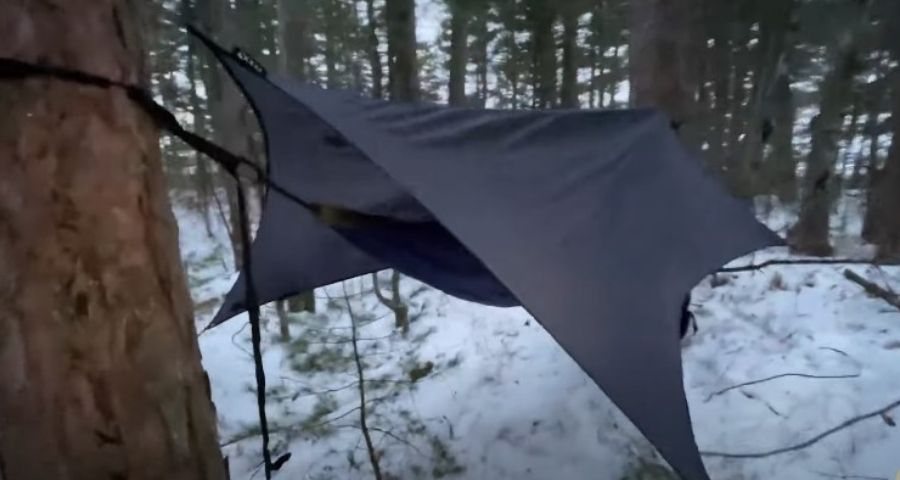
#5 Tarp/Rainfly
A tarp or rainfly is a piece of waterproof fabric that you pitch over your hammock to avoid harsh weather. It protects you from rain, snow, and high winds.
#6 Sleeping Pad
Sleeping pads help make your hammock a little comfortable and also stop the cold breeze from below. Pads are made from foam and helps retain body temperature as well.
But pads are not the ideal way to keep yourself warm if the temperature is really cold. In such a case, you will have to opt for a top+under quilt combo.
#7 Under Quilt / Over Quilt
Quilts are necessary if you are camping during winters or even in summers if the night temperature drops below your comfort level.
Although you can use your normal sleeping bag to keep yourself warm, there is a problem with that. A sleeping bag gets pressed under your weight and loses its ability to retain heat over time.
For that purpose, under quilt is ideal. It’s a quilt that you attach to the outer side of the bottom of your quilt. It doesn’t get crushed under your weight and helps you remain cozy during cold weather.
Read our detailed article about staying warm in a hammock during cold nights.
Types of hammock
Now that we know the basic parts of a hammock, let’s discuss what types they come in and how are they different from each other.
Rope Hammock
Also called a net hammock is a kind of hammock made from loosely netted ropes. Ropes are normally made from cotton or polyester. A rope hammock is best for a casual nap along the beachfront but is unsuitable for use in the wilderness. It comes with a spreader bar to keep the ropes from intermingling.
Gathered End Hammock
This is the most traditional type of hammock where each of the head and foot end of the hammock are gathered at a single point and tied to the suspension system. These hammocks are less complex, easy to carry and install. These are arguably the most common among campers.
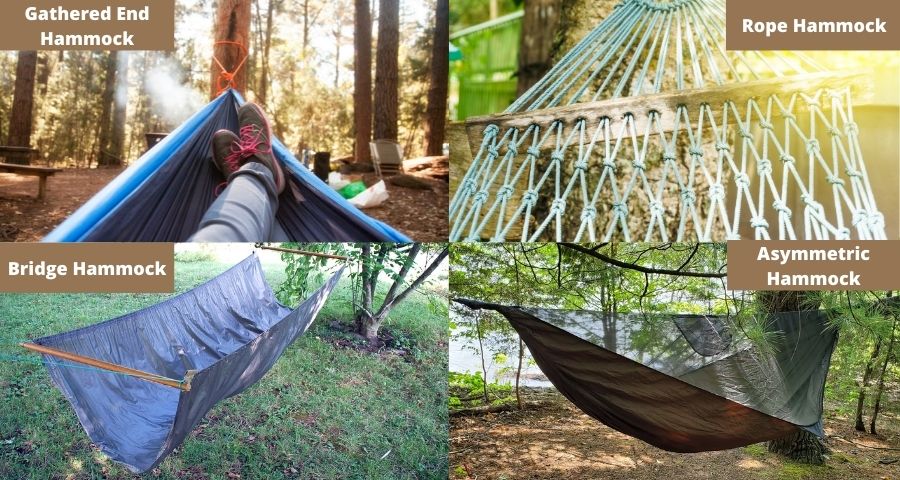
Bridge Hammock
, Unlike gathered end hammocks, bridge hammocks have straight bars at head and foot ends to hold the hammock like a loose cot. Bridge hammocks are best for people who are tall and like a little more room to get comfortable.
Asymmetric Hammock
Asymmetric hammocks (like this one) are modified gathered end hammocks with a wider center part to provide a better and flatter sleeping area.
Apart from these major hammock types, you will find in the market, there are also other types of hammocks like the Brazilian Hammock, Nicaraguan Hammock, Mayan Hammock, Quilted Hammock, etc., each with its specific unique qualities.
How to choose the right hammock?
Hammock selection for your next camping trip is not as hard as you might think. Although there are many hammock types out there with different fabric types, netting, build types, etc., only a few of them are designed for long-term camping.
Let’s see what should we look for in a camping hammock that is suitable for long term use in the wilderness.
Type of hammock
As we discussed different types of hammocks above, I wouldn’t recommend every type for wilderness camping. To camp with comfort and safety in the wild, picking the right kind of hammock is key.
First of all, avoid rope hammocks with spreader bars at the end. They are great for beachside or backyard naps but not at all good for prolonged camping including night stays.
The best type of hammocks for camping are gathered-end or bridge type. With a gathered end type, you can either go with a traditional symmetrical shape or opt for an asymmetrical design for additional comfort.
Also, some companies make single as well as a double hammocks. Double hammocks are designed for two-person, but in my personal experience, a hammock is not the best spot to cuddle up with your partner comfortably. However, double hammocks are a little wider and can be used by one person with better breathing room.
Weight
One of the reasons we opt for a hammock instead of a tent is relative weight and ease of packing. Hammocks are comparatively lighter on the shoulder, and unlike camping tents, they have few moving parts carry.
An ideal hammock should weigh less than 1 kg in weight. If you include additional accessories like quilts, pads, and bug net, the weight might reach 1.5kg but anything above that will be hard to carry and will kill one of the major benefits of a hammock over a tent.
Length & Width
You do not want to carry a hammock to camping and find out you doesn’t fit in properly (I have been there actually).
Choosing the correct length and width depends on how big or small you are. The most commonly available hammocks are 8 – 10 feet long and 4 – 6 feet wide. This caters to most people, but if you are an outlier, make sure you buy a hammock that’s twice your height length.

Max. weight capacity
Like your height, your body weight is another important consideration while selecting the right hammock.
All manufacturers mention the maximum carrying capacity of the hammock system (including the suspension system). Most commercial hammocks are rated between 300lb to 400lb which will support most people but if you are particularly heavy, make sure you select a hammock that has a rated capacity of twice your body weight.
Material
Hammocks comes in all kinds of material from soft cotton ropes to tough nylon and polyester fabric.
For camping, select either Nylon or Polyester fabric. Nylon is a common choice for most campers as it is light and breathable. The thickness of the Nylon is measured in denier (D). A 70D fabric is perfect for comfortable camping. Above that, it gets unnecessarily heavier without any significant benefit.
Nylon and polyester hammocks are also easier to wash. Read more about washing your hammock without damaging the fiber.
Suspension type
Selecting the right suspension is as important as selecting the right kind of hammock. An ideal suspension should be
- Strong enough to hold your weight
- Should be easily adjustable
- The tree hugging part should be wide enough to distribute the pressure evenly on the trunk
- Can be easily installed and taken off.
You can either get suspension with your hammock, or you buy one off the shelf. Before you buy off the shelf, make sure its rated capacity matches that of the hammock.
Recommended Hammock Brands
Below is a summary table with a few of my recommended Hammocks.
| Brand | Dimensions | Capacity | Material | Weight |
|---|---|---|---|---|
| ENO JungleNest | 10’x4.8′ | 300 lb | Nylon | 1.2 lb |
| Covacure | 8’x4′ | 440 lb | Nylon | 1.7 lb |
| Kootek | 9’x4.5′ | 400 lb | Nylon | 1.85 lb |
| Winners | 10’x6.5′ | 500 lb | Nylon | 1.5 lb |
| Grand Trunk | 10.6’x5′ | 400 lb | Nylon | 2 lb |
Hammock vs Tent – which is better
Tents are an old and reliable method of sleeping in the wild. While hammocks are cool and stuff, they are still the new kid in town, and most campers are not fully aware of the benefits of hammocks over traditional tent camping. Hammocks are safe, reliable, affordable, and comfortable way of spending your night in the wilderness.
If you sit with a group of outdoor enthusiasts, you will hear arguments in favor of both sides. Both tent and hammocks have their pros and cons, and at the end of the day, it’s all about personal preference.
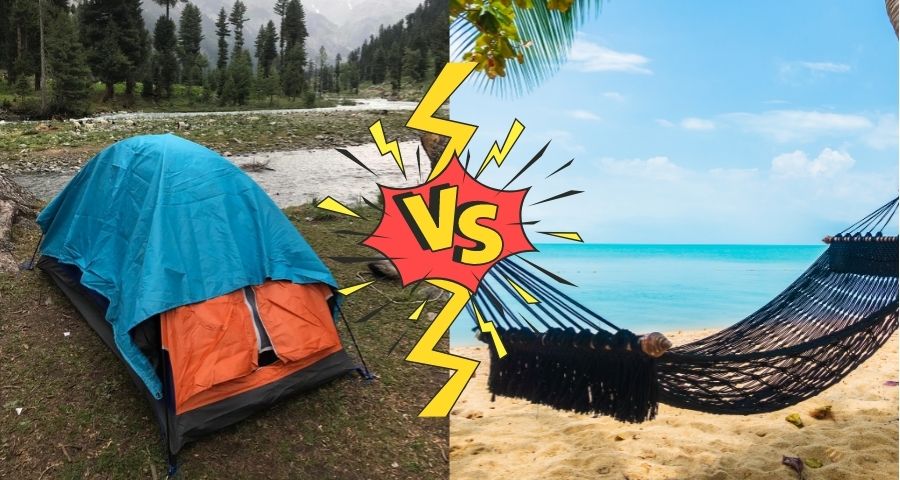
The purpose of this article is to highlight the benefits of hammocks as an alternate (and in my personal opinion, a better) option for traditional tent camping. Read my detailed article about tent vs hammock camping if you want to know more but the below table summarizes the major differences.
| Factor | Traditional Tent | Hammock |
|---|---|---|
| Comfort | ✔ | |
| Cost | ✔ | |
| Good for summer | ✔ | |
| Good for winter | ✔ | |
| Protection | ✔ | |
| Bad weather protection | ✔ | ✔ |
| Good for family trip | ✔ | |
| Weight | ✔ | |
| Ease of setup | ✔ | |
| Mobility | ✔ | |
| Good for solo camping | ✔ |
How to hang a hammock
Now that we know something about hammocks and its parts, let’s discuss how can we hang our hammock to make the most out of it.
If this is your first time hammock camping, don’t expect to get it right the first time. Like all crafts, hammock camping needs a little experience that comes from hit & trial. But once you get the hang of it, it becomes pretty easy.
Follow the following steps to get your hammock up correctly for a relaxing evening/night.
Select suitable trees
The very first step is to select a suitable set of trees to hang your hammock.
Depending on the length of your hammock and its attachments, the ideal distance between the trees should be somewhere between 10 feet to 15 feet.
If the trees are further apart, you can use a longer attachment but it will result in a more curved hammock at the bottom which might not be desirable for some people.
The ideal angle the rope should make with the tree is 30 degrees. Keep that in mind while selecting your tree spacing and attachment height. You can adjust the length of the rope and the suspension system height to get the 30-degree angle for a comfortable posture.
Both the trees should be strong, sturdy, and should be able to bear your weight. The trees should preferably be green. If the trees are dead, make sure they are not rotten and hollow from inside. To check that, you can knock on the bark with the back of your hand and listen to a hollow sound.
Be aware of widowmakers. Widowmakers are tree branches that are broken and hanging in in the branches and can come down any time if there is a wind. Check this photo guide to identify widowmakers above your hanging spot.
Once you make sure the two trees are perfect, its time to hang your hammock.
Bonus reading: How to hang a hammock without trees?
Install suspension system
We discussed the types of suspension systems commonly available in the market. It doesn’t matter if your suspension system is a normal rope or a fancy daisy chain strap, the installation is pretty similar.
An important point to note here is the height of the attachment point. As discussed above, your hammock rope should make a 30-degree angle with the horizontal. If you select too high of a point to wrap your suspension, it will be too steep. If you wrap it too low, the angle will be too flat.
Rule of thumb is to select a point at your eye level, hang your hammock and then check the angle with your fingers (see below illustration). If the angle is way off the 30-degree mark, adjust the height or the length of the rope till you get it right.
Avoid using a thin rope to wrap around the tree as it ends up damaging the bark. Use a webbing or a thicker cotton rope to distribute the pressure evenly over a larger surface. Webbings also provide better grip compared to ropes and are easy to install and take off.
Append hammock ends
Most suspension systems have hooks (like the daisy chain strap) or knots where you can append your hammock end.
If you are using a simple rope with no loops or knots, you can create the famous but simple marlin spike hitch to hook up your hammock end. See the video below to learn how to do that.
Most hammocks come with either a carabiner or a whoopie sling. You can use both to hook your hammock up with the marlin spike hitch.
Check the hammock angle again
Once you install both ends of the hammock, make sure both the ends make a 30-degree inclination with the horizontal (see illustration below). If any of the ends are too far off from the 30 degrees, adjust the height of the tree hugger or length of the hammock rope to get to the 30-degree golden angle.
Some people like to have their foot end a little higher than the head end for better comfort but its a personal choice. Try different combinations till you find your sweet spot.
Also make sure that you are not hanging too high up in the air for two purposes;
- If you are too high, it is difficult to get in and out of your hammock and you can potentially injure yourself.
- If you are too high in the air and you fall during the night due to poor installation or rope/suspension failure, you risk injuring your back.
Ideally, you should not be more than 8 feet above the ground.
Install bugnet & tarp
Now that your hammock is up, the final thing to do is install a bugnet and a tarp or rainfly.
If you are in an area without any mosquitos and other flying insects, you can do away with the bug net. But if it’s summer times and you are in a tropical area, a bug net will be your savior during the night.
Some high-end hammocks come with an integrated bug net. If you have a simple hammock, you can hang your bug net over your ridgeline and tie the ends at the bottom to make a closed loop.
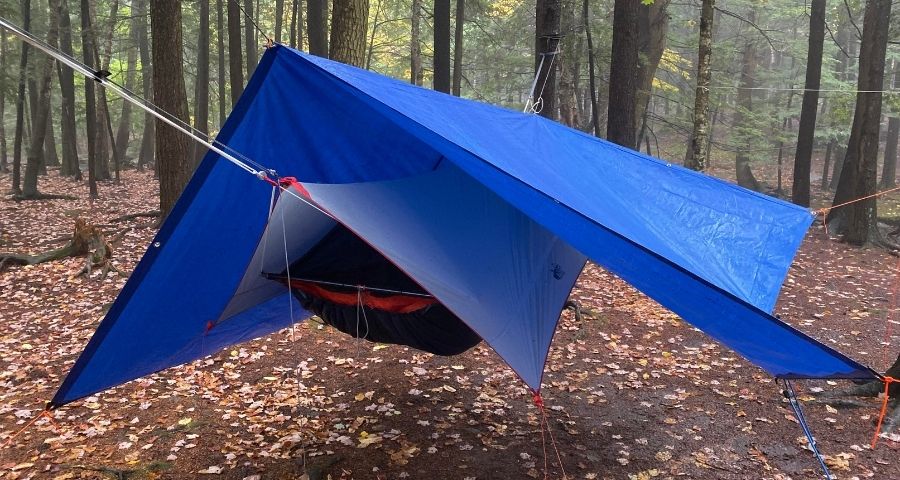
Similarly, if there is a chance of rain during the night, don’t forget to install your tarp or rainfly. Basically, any tarp can be used as a rainfly. Just hang it over your ridgeline and anchor the ends on both sides of the hammock through guylines.
If you want some breathing space above your head and don’t want your rainfly to be in your face, you can install an additional Ridgeline 2 -3 feet above your hammock and attach the rainfly (see the image above)
You can read our recent blog post to get more tips about hammock camping in rain.
Lastly, install drip lines to the ropes on both sides. A drip line is a piece of cord attached to the main rope with one end open. During a rainy night, it collects the rainwater flowing through the rope, and it drips down from the open end instead of entering your hammock (see image below)

hammock hang calculator
The below calculator will help you calculate your hang variables with a few inputs. You can switch between easy and advanced modes. Advanced mode lets you customize more variables to make your hang even more comfortable.
Hammock camping accessories – a checklist
If this is your first time going for a hammock camping, make sure you get all the necessary items from the below checklist to make your stay comfortable.
Do note that these are items just related to the hammock. You will also be carrying other items related to your camping activities besides hammocking, including but not limited to cooking, hunting, first aid, etc.
| Sr. No. | Item | Quantity | Recommended |
|---|---|---|---|
| 1 | Hammock | 1 | Amazon Link |
| 2 | Hammock Ropes | 2 | Amazon Link |
| 3 | Tree huggers/straps/daisy chain | 2 | Amazon Link |
| 4 | Carabiners | 2 | Amazon Link |
| 5 | Ridgeline | 1 | (any rope will work) |
| 6 | Guylines & Stakes for rainfly | 4 – 6 | Amazon Link |
| 7 | Drip lines | 4 | (any rope will work) |
| 8 | Bug net | 1 | Amazon Link |
| 9 | Tarp / Rainfly | 1 | Amazon Link |
| 10 | Under Quilt (if required) | 1 | Amazon Link |
| 11 | Top Quilt (if required) | 1 | Amazon Link |
| 13 | Sleeping Pad | 1 | Amazon Link |
Hammock camping best practices
It’s a common connotation that hammocks are not very comfortable for sleeping at night. This is prevalent among the non-hammockers only. Once you try a hammock, there is no going back.
However, if you are trying a hammock for the first time, it might take some practice to get comfortable, and you will soon learn how to sleep in a hammock properly. Most people are not used to sleeping in a rocking bed made of fabric. Here are some tips and the best ways to sleep in a hammock.
- Do not hang your hammock too tight. Let the hammock have enough sag at the bottom to get a nice curvature for a comfortable sleep. As a rule of thumb, your hammock ropes should make a 30-degree angle with the ground. If the angle is below 30 degrees, it’s too tight.
- Try sleeping diagonally instead of aligning your head and foot with the hammock centerline. You can try different angles, but for most hammock sleepers, a 30 degree turn from the centerline is quite comfortable. Find your own sweet spot for the best comfort.
- Do not hang the hammock too high or too low. An ideal distance from the ground is no more than 2 feet. This will help you in getting in and out of your hammock and also will protect your back in case you fell during your sleep.
- Some campers prefer sleeping with their legs a little higher than their head. This helps in better circulation of blood and result in better sleep. Hang your foot end a little higher than the head and see if you like this position better.
- Never go hammock camping without a bug net and rainfly. This might seem like a no-brainer, but most people coming from tent camping might overlook this. Without a bug net to guard against insects and a rainfly to be your savior during a midnight spell, your hammock camping can go wrong any time.
- For a comfortable sleep, bring a sleeping pad and an underquilt (during cold nights). Especially in winters, you will need a warm bottom to be comfy.
- Use a drip line to avoid rain water getting into your hammock via the hammock attachment. A dripline is simply a piece of cord tied to the hammock rope on each side with the other end open. The water flows through the line and drips down at the open end instead of getting into your hammock.
- Laying on your back is not the only option while sleeping in your hammock. Try sleeping on your side, especially if you are a side sleeper in bed. You will be amazed at how the hammock adapts to your body’s natural curvature without creating any pressure points. You will sleep like a tired baby.
- Use a small pillow to elevate your head by 10 – 20 degrees to get into a more comfortable and familiar position. If you don’t have an inflatable pillow, you can also use your jacket. Just curl it up and put it below your head.
(Note: These hammock camping tips are based on my own personal experiences. If you have come across anything else that might make hammocks more comfortable, please consider sharing with me on ahmed @ trucampers.com and I will include it in this list with due credit)
Take care of your backpack & food while hammock camping
While camping in a traditional tent, you can easily store your backpack and food items inside your tent safely, but with the hammock, this becomes a bit tough. There is no additional room inside your hammock to store your huge backpack. So, what do you do?
You can’t leave your items on the ground beside you for a few reasons;
- It can rain during the night and can ruin all your stuff
- Wild animals can smell the food items and coming running
- Insects like spiders and other crawlers can get inside your boots and bags
So, how what can you do to safely store your backpack and other camping stuff during hammock camping? Well, there is no one solution fit all kind of thing here. People have their own ‘on the fly’ solutions depending on what they are carrying, what kind of place they are hanging and how the weather is like.
Here are a few tips that you can adapt to keep your stuff safe during the night.
Tip#1: Use a carabiner or whoopi sling to hang your backpack with your hammock strap. That way, your bag will be a few feet above the ground and will be out of reach for most wild animals and crawlers.
Tip#2: Pack all your food items into airtight bags to suppress the odor. Food smells can attract wild animals especially bears (if there are bears in the area). Storing edibles in airtight bags can keep these animals away. You can get these dry bags from Amazon easily (link). They are usually called bear bags because they help avoid bears by suppressing the food smell.
Tip#3: Hang your shoes and trekking/hiking boots on a nearby tree branch using the laces. If you leave them on the ground, crawlers can get cozy inside during the cold nights. To be extra cautious, stuck your socks inside to make it harder for something to get inside.
Tip#4: Get a rain cover for your backpack. Raincovers are necessary not only for hammock camping but for camping in general. Keep one in your backpack’s outer pocket, and if it starts raining, quickly get it out and slam it over your entire pack. You can use the same rain cover during the night when you hang your backpack on a tree.
To hammock or not to hammock? – Conclusion
Hammocks are amazing sleeping place during any camping trip. They are easy to carry, extremely comfortable, versatile and light on your pocket. Compared to a traditional tent, you don’t need find an ideal place to sleep comfortably. All you need is two suitable points to hang you hammock and you are all set for the night.
If you haven’t tried a hammock before, make sure you take one with you on your next camping trip (along with your tent) to give it a test drive. If you like it, you can put your tent in the storage and make the hammock your primary camping partner.
Make sure to check out our Hammock Camping resource below to familiarize yourself with most frequently faced problems.
Happy Hammocking 🙂
Hammock Resource Section


Recommended Camping Gears: I have compiled a list of my favourite camping gear in one place. The selection is based on my own personal experience using them for many years camping as well as feedback from fellow campers. Check them out on my Recommended Camping Gears page